


File storage site Dropbox offers a tool designed to let you create and share specific types of content with colleagues and other professionals. The tool, known as Dropbox Capture, lets you record your screen, camera, and microphone to create video messages, audio recordings, screenshots, and more. Once you have figured out the specific type of content, you can share it with other people.
Why use Dropbox Capture instead of another tool? The purpose behind this program is to help you avoid unnecessary meetings or conference calls when you need to convey or share something with team members and other colleagues. For example, you can use Dropbox Capture to create and share a software tutorial, sales proposal, design layout, or status updates for a specific project.
Dropbox Capture is available on all Dropbox plans, although the amount of capture time varies based on your plan. Dropbox Basic, Plus, and Family plan users can record up to two hours with no limit on individual recordings. Dropbox Professional, Standard, Advanced, and Enterprise plan users have unlimited recording time up to their storage limit.
Install Dropbox Capture
To get started, download the Dropbox Capture program for Windows from the Dropbox website. After installing the software, log in with your Dropbox account and then allow the program to connect to your account.
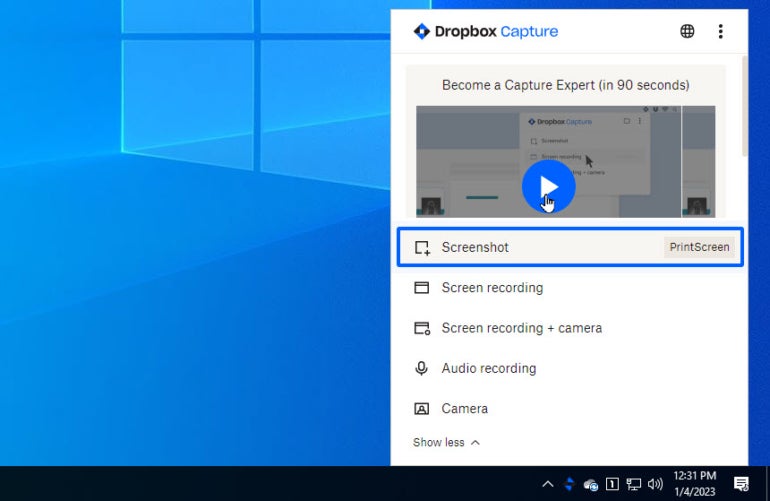
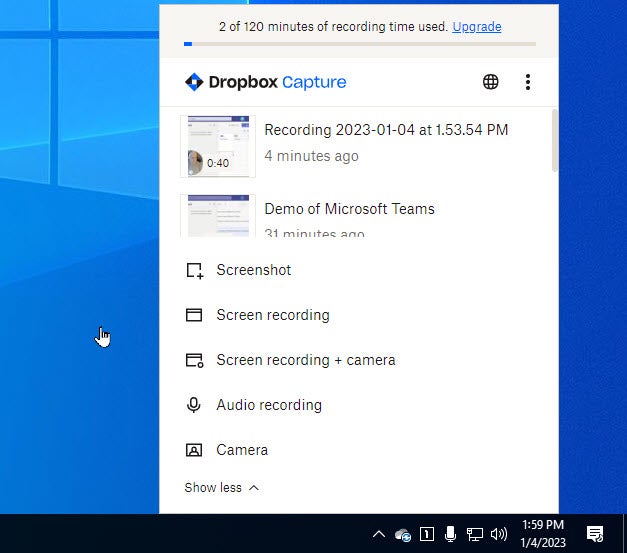
Dropbox Capture opens from the taskbar icon and shows the different types of activities you can perform, such as screenshot, screen capture, and screen capture plus camera. Click Show more to see other activities, including audio recording and camera. A thumbnail video appears in the center. Click the Play button for the video to watch a short tutorial (Image A).
Image A
Take a screenshot
Dropbox Capture lets you take a screenshot of your entire screen, any area you select, or a specific window. In the Capture window, click the first Screenshot option or press the Print Screen key. You can click or press Enter to capture your entire screen, or click and drag your mouse to capture a specific portion of the screen. To take a screenshot of a specific window, press the space bar, move your mouse pointer to the window you want to capture (which will then turn pink), and click the mouse (Figure B).
Figure B
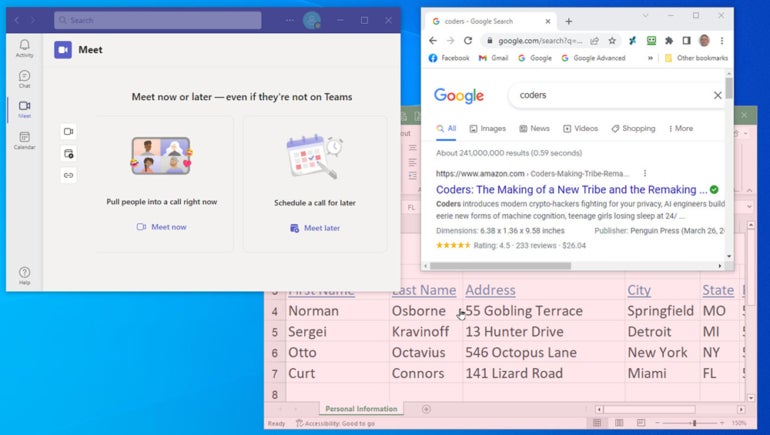
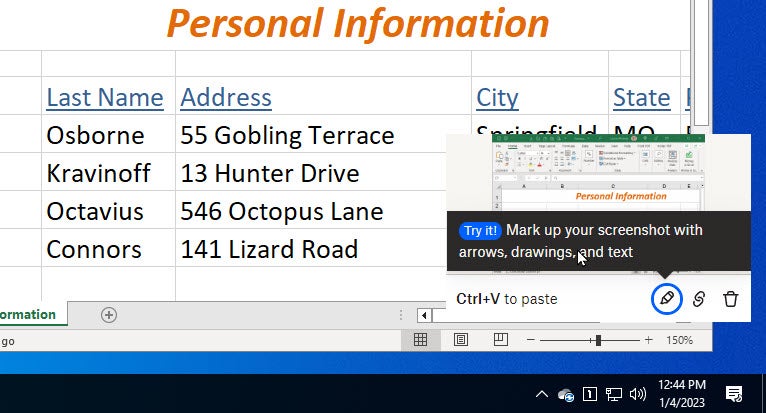
After taking the screenshot, the resulting image will appear in the bottom right corner of the screen. To mark the image, click the Mark button (Figure C).
Figure C
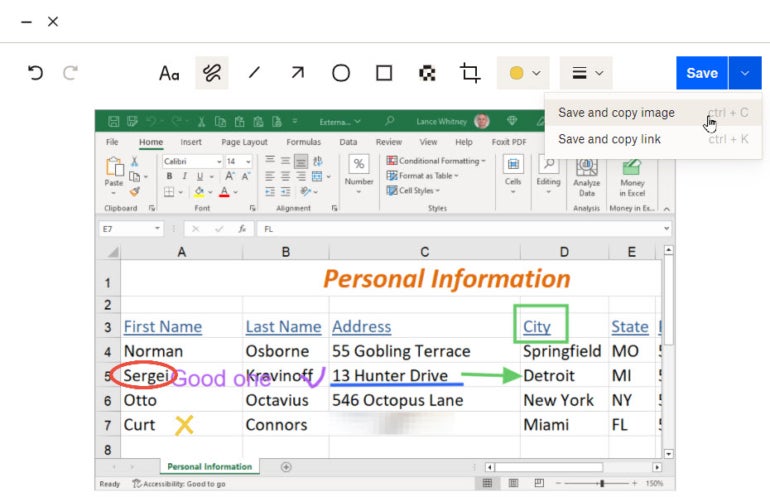
The image opens in a window with a toolset at the top. From the icons, you can add text, lines, arrows, circles, squares, and blurs. You can even change the width and color of the lines, crop the image, and undo your last action (Figure D). When you’re done, click Save or click the down arrow and select Save Image and Copy or Save Link and Copy. Anyone with the link can then view the screenshot.
Figure D
Record your screen
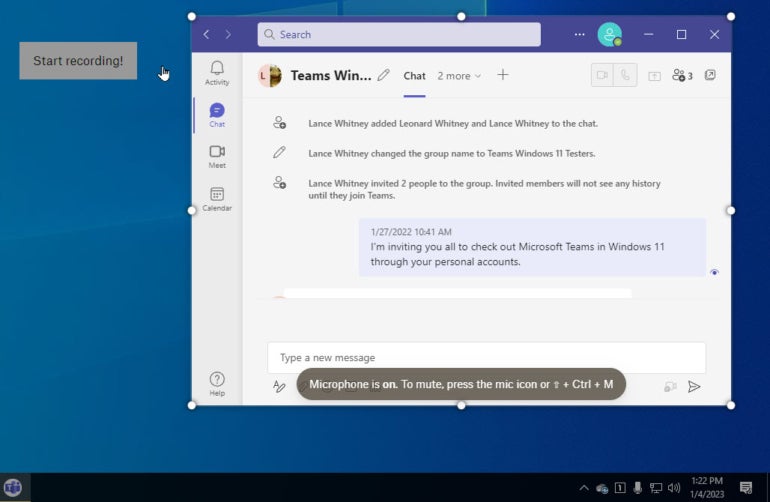
Then you can record your screen as a video. In the Capture window, click the Screen Capture option. Then click or press Enter to record your entire screen, or click and drag your mouse to capture a specific portion of screen activity. Similar to the screenshot feature, you can also press the space bar to record a specific window, then move your mouse pointer to the window you want to record and click your mouse. Click the Start button to start recording (Figure E).
Figure E
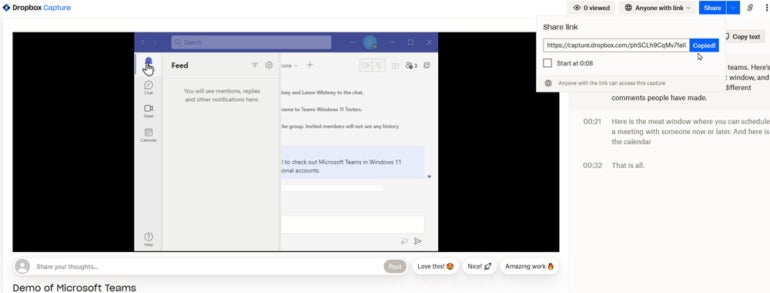
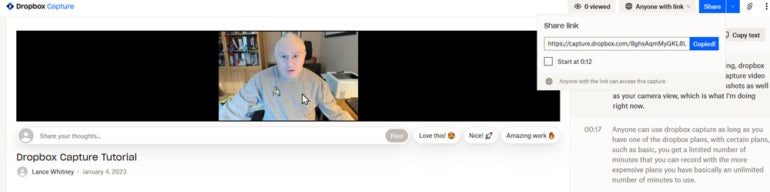
While the recording is active, click the pencil icon to draw on the screen recording. When you are done, click the Stop button. The video is generated and displayed on a Dropbox Capture web page. From here you can play the video, rename it, see a transcript of the audio, and share a link to the video. You can also download the video as an MP4 file. People you share the link with can then play and comment on the video (Figure F).
Figure F
Record your screen and yourself
If you want to record a video narrating the screen recording, click the Screen recording + camera option. Click or press Enter to record your entire screen; drag your mouse to capture a specific portion of screen activity; or press the space bar to choose a specific window and include it. Click the Start button to start recording (Figure G).
Figure G
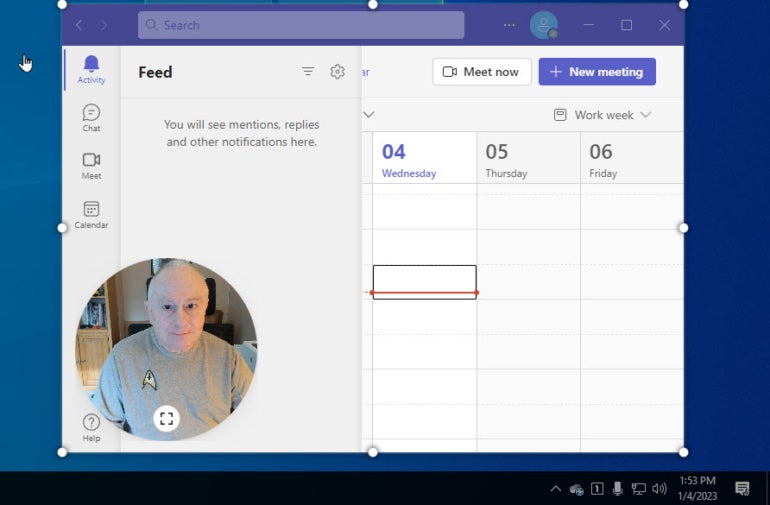
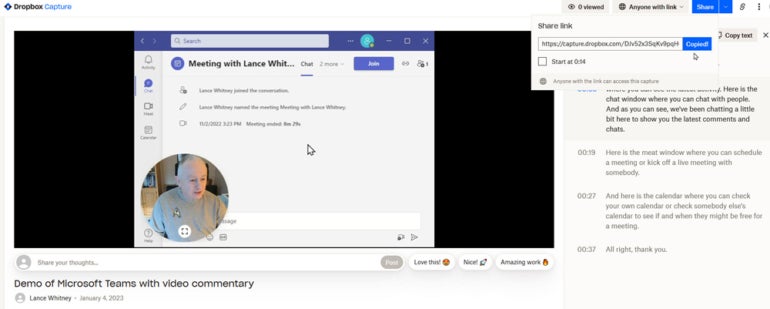
The formatting and sharing process is the same as a regular screen recording. While the recording is active, you can click the pencil icon to draw on the screen recording. When the video is ready, it will appear as a Dropbox Capture web page. From here you can play the video, rename it, see a transcript of the audio, and share a link to the video or save it as an MP4 file. People you share the link with can then play and comment on the video (Figure H).
Figure H
Make an audio recording
To record audio only, click the Show more link and select Audio recording. Press the start button to start recording. Then speak or play the audio you want to record (Figure I).
Figure I
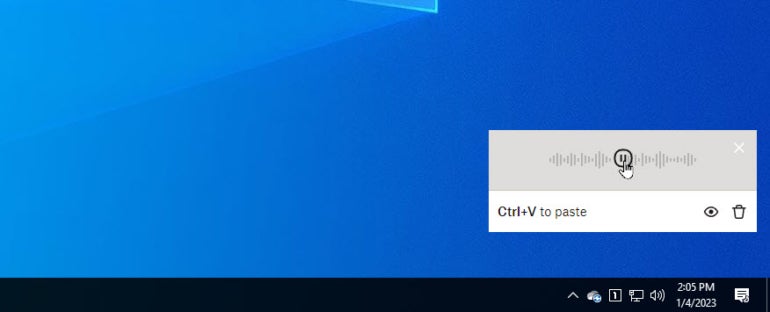
When you’re done, hit the Stop button and a player window (figure J). Click the Play button to listen to the recording or click the Watch button to see and listen to the recording on a Dropbox web page. From there, you can share the recording with other people via a link.
figure J
Record yourself
If you simply want to record yourself or someone else or anything else using your PC’s camera, go for the Camera option. Post yourself or another subject and click the Start button. When you are done, click Stop. The video then appears on a web page where you can play it, view the transcript, and share it with other people (figure K).
figure K
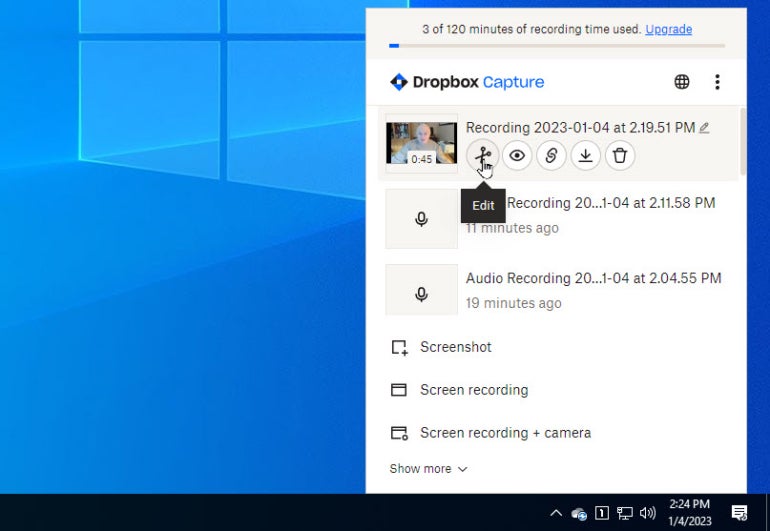
The Dropbox Capture window keeps track of all your captures. Hovering your mouse over a specific recording will bring up a toolbar with options to edit or view the recording, copy the link, download or delete (Figure L).
Figure L
Use Dropbox Capture your way
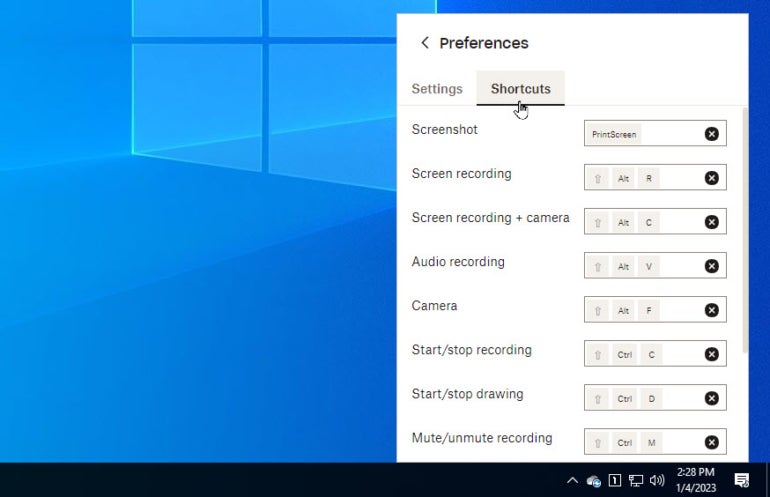
If you want, you can customize some Dropbox Capture options. In the Capture window, click the three-dot icon at the top and select Preferences. In the Settings tab, you can change the camera, audio source, video resolution, and other options. And in the Shortcuts tab, you can change the shortcuts that trigger different activities (figure M).
figure M
Lance Whitney shares more Dropbox tips here: Using Dropbox Transfer to securely share files with other people and Using Dropbox Backup to back up your files to the cloud.
Source link
